Chúc mọi gia đình được no ấm!
Showing posts with label Sưu tầm. Show all posts
Showing posts with label Sưu tầm. Show all posts
Friday, January 16, 2015
Mất ngủ và cách phòng tránh mất ngủ

Mất ngủ
được coi là tình trạng rối loạn giấc ngủ, khi đó người bị mất ngủ khó
rơi vào giấc ngủ hoặc không duy trì được giấc ngủ dài như mong muốn. Mất ngủ dẫn
tới suy giảm chức năng khi tỉnh táo. Mất ngủ có thể xảy ra ở mọi lứa
tuổi, người già thường dễ bị mất ngủ hơn. Mất ngủ lâu ngày có thể dẫn
tới các vấn đề về bộ nhớ, trầm cảm, khó chịu, tăng nguy cơ mắc bệnh tim
mạch.
Phân loại mất ngủ:
Mất ngủ được phân thành 3 loại: mất ngủ thoáng qua, mất ngủ cấp tính, mất ngủ mãn tính.
Mất ngủ thoáng qua: tình trạng
mất ngủ kéo dài chưa đầy 1 tuần. Mất ngủ thoáng qua có thể do yếu tố môi
trường, thời gian ngủ, rối loạn tâm lý, sự căng thẳng,.. hoặc rối loạn
khác. Hệ quả: buồn ngủ, suy giảm tâm thần vận động như người bị thiếu
ngủ.
Mất ngủ cấp tính:
không thể ngủ ngon liên tục trong thời gian khoảng 1 tháng. Người bị
mất ngủ cấp tính thường khó đi vào giấc ngủ, duy trì giấc ngủ trong thời
gian dài, sau khi ngủ dậy không cảm thấy dễ chịu. Mất ngủ cấp tính
thường do yếu tố căng thẳng gây ra.
Mất ngủ mãn tính: là tình trạng
mất ngủ xảy ra từ một tháng trở lên. Nguyên nhân do rối loạn các chức
năng của cơ thể, thường là do căng thẳng quá độ, kích thích tố, hoặc
thay đổi ở các cấp độ của cytokine gây mất ngủ mãn tính. Hệ quả: mệt mỏi
cơ bắp, ảo giác, tinh thần mệt mỏi, chóng mặt,…
Thuốc đặc trị mất ngủ
Đối với các bệnh nhất bị mất ngủ thoáng
qua, mất ngủ mãn tính, hoặc mất ngủ cấp tính đều có thể cải thiện tình
trạng mất ngủ, lấy lại được giấc ngủ tự nhiên nhờ sản phẩm Chè an thần
của phòng khám Đông y Nguyễn Hữu Toàn. Chè an thần là sản phẩm được
điều chế hoàn toàn bằng các thảo dược tự nhiên như: lạc tiên, táo nhân,
tâm sen,… có tác dụng an thần định trí. Chè an thần mang đến giấc ngủ tự
nhiên mà không để lại các tác dụng phụ như một số loại thuốc ngủ tây y
khác. Sản phẩm có thể dùng uống thay nước lọc hàng ngày và giúp phòng
tránh bệnh mất ngủ.

Chè an thần đặc trị mất ngủ
Làm thế nào để tránh mất ngủ
Để phòng tránh mất ngủ cần duy trì một
thời gian biểu thích hợp: đi ngủ và thức dậy đúng giờ, không nên thức
quá khuya. Tránh các đồ uống chứa caffeine 8 giờ trước khi ngủ. Tập thể
dục thường xuyên, đều đặn rất tốt cho một giấc ngủ ngon tuy nhiên không
nên tập thể dục ngay trước khi ngủ. Ngoài ra nên giữ cho tinh thần luôn
thoải mái, tránh căng thẳng.
Theo Thaythuoccuaban.com
http://matngu.net/2-phong-tranh-benh-mat-ngu/mat-ngu-va-cach-phong-tranh-mat-ngu
THỨC ĂN CHỮA CHỨNG MẤT
NGỦ
BS. HOÀNG XUÂN ĐẠI
Mất ngủ là triệu chứng
của nhiều nguyên nhân. Vì vậy muốn chữa tận gốc nguyên nhân sinh bệnh thì
phải được các thầy thuốc xác định thì chữa mới có hiệu quả. Ắn uống những
thứ sau đây chỉ giúp thúc đẩy quá trình lui bệnh. Dĩ nhiên các thức ăn này
lại là những vị thuốc nam mà các lương y vẫn dùng để chữa các chứng mất ngủ.Theo Đông y, khi lao tâm quá đã làm cho tâm huyết hao tổn, nên tâm không giữ được thần, hỏa không hãm xuống dưới, mà thủy không thể lên trên khiến cho tâm thần bất giao, tinh thần rất kết làm can, đơn hỏa vượng, tì, vị bất hòa gây nên chứng mất ngủ.
Ở tuổi trẻ khí huyết thịnh, cơ nhục trơn chu, kinh mạch thông sướng, hai khí doanh vệ cận hành đúng quy luật nên ban ngày sảng khoái ban đêm ngủ ngon, người ta thường độ tuổi trên 50 khí huyết bắt đầu suy nhược, cơ nhục khô héo, kinh mạch trì trệ, hai khí doanh vệ bắt đầu vận hành lệch lạc do đó làm cho khó ngủ về đêm nên ngày mệt mỏi.
Mất ngủ có thể chia làm hai loại: hư chứng và thực chứng vì vậy phép chữa trị cũng có khác nhau. Đối với hư chứng, cần bổ khí, dưỡng huyết, tư âm giáng hỏa - còn thực chứng lại thanh tiết hỏa ở can, đơn kiện tỳ, hỏa đàm, tiêu trợ.
Thuốc chữa mất ngủ thì nhiều, ở đây xin giới thiệu những thức ăn làm dễ ngủ.
* Rau nhút: Đông y gọi là quyết thái. Nấu canh rau nhút non, lá vông nem, khoai sọ, củ súng, củ sen, tôm hoặc thịt lợn nạc băm hay xay, giã ăn ngon vừa bổ dưỡng lại chữa mất ngủ.
* Củ sen: Là phần cây nằm dưới bùn có tác dụng dưỡng tâm, an thần, bổ tì, cố tinh v.v... Nấu canh ăn chữa được mất ngủ, suy nhược.
* Hạt sen: Nấu chè hạt sen hoặc nhồi hạt sen vào bụng chim, bồ câu con hầm ăn hoặc nhồi hạt sen vào vịt, dạ dày lộn gọi là món tiêm ăn ngon. Hạt sen tác dụng vào các kinh tâm, tì, thận, làm thuốc bổ tì, dưỡng tâm, an thần, cố tinh, chữa mất ngủ và suy nhược thần kinh.
- Lưu ý: các bộ phận của cây sen đều dùng làm thuốc mà lại tác dụng khác nhau nên cần thận trọng khi dùng ví dụ lá sen không có tính an thần.
* Tâm sen: Đông y gọi là liên tâm, là mầm xanh nằm giữa hạt sen đó mới thật là quả sen - có vị đắng, tính hàn, tác dụng thanh tâm, khử nhiệt, chữa bệnh tim hồi hộp, mất ngủ, di mộng tinh thường dùng với liều 4g-10g. Dùng tâm sen khô sắc nước uống. Nước rất đắng nên pha chút mật ong hoặc đường cho dễ uống. Có tác dụng gây ngủ mạnh hơn hạt sen nhiều lần và êm.
* Củ súng: Vị ngọt nhạt, tính bình tác dụng vào các kinh tâm, tì, thận làm dưỡng tâm, bổ tì, ích thận, cố tinh - chữa chứng mất ngủ, suy nhược lấy củ súng nấu canh ăn.
* Nhãn: Vị chua, ngọt, tính bình, nhãn bổ dưỡng tâm, tì nên dùng chữa mất ngủ, thần kinh suy nhược, trí nhớ giảm. Nhãn tươi chế biến thành long nhãn để dùng dần.
* Táo: Vị ngọt, tính ôn tác dụng vào lúc hai kinh tì và vị. Táo bổ tì, vị sinh tân dịch, ích khí, an thần, điều hòa doanh vệ, hòa giải các vị thuốc kết hợp.
* Toan tảo nhân: Là nhân trong hột táo chua, tính an thần rất mạnh liều dùng 1g-2g. Không quá liều vì độc, cần lưu ý: nếu sao vàng sắc uống chữa mất ngủ. Để sống (không sao) lại làm cho không ngủ.
* Vông nem (gọi là lá vông nem vì dùng gói nem chua): Bộ phận dùng làm thuốc là lá, vỏ, thân. Tác dụng an thần mạnh nên Tây y thường chế siro lá vông - không dùng dài gây độc. Liều 4g-10g mỗi ngày.
* Lạc tiên: Mọc hoang ở đồi, rào... Bộ phận dùng phần dây trên mặt đất tức là thân và lá. Lạc tiên vị ngọt nhạt, tính mát, không độc, có công năng đi vào hai kinh can và tâm. Tác dụng dưỡng tâm, an thần. Chữa suy nhược thần kinh mất ngủ. Thành phần là hoạt chất bởi nhiều chất như alcaloid nhóm harman, các flavoinoid; nhóm Isovitexin, Maltol và Ethylmaltol. Dùng dưới dạng thuốc sắc (thân và lá khô), liều dùng trung bình từ 20g-40g. Thân già càng tốt, có mùi thơm đặc trưng.
* Bá tử nhân: Tức nhân trong hạt cây trắc bá, vị cay, tính bình tác dụng vào các kinh tâm, can, thận - dưỡng tâm, an thần, nhuận tràng, thông tiện, thường dùng trong các trường hợp mất ngủ do tâm thận bất giao, lo sợ, hồi hộp. Liều 4g-24g mỗi ngày.
* Nước ép quả cà chua: pha thêm chút mật ong hoặc đường cát với độ ngọt tùy ý, uống vào đêm lúc đi ngủ sẽ ngon giấc.
Ngoài ra còn có thể dùng các loại thuốc như thần sa ha chu sa hoặc các loại tân dược nhưng cần có sự chỉ dẫn kỹ lưỡng của bác sĩ hầu hết các loại thuốc này đều độc gây chết người hoặc gây nghiện.http://ykhoa.net/duoc/dinhduong/55-10.html
Bài thuốc nam trị bệnh mất ngủ

Mất ngủ thường kèm theo những triệu chứng: đau đầu, váng đầu, chóng mặt, hay quên, tim hồi hộp, ăn uống kém.
Nguyên nhân của bệnh là do tinh thần kích động, lo nghĩ khiếp sợ, rối loạn tâm trí, đau ốm kéo dài làm cho thận âm hư tổn không nuôi được tâm tỳ, dẫn đến tình trạng mất ngủ. Để điều trị chứng bệnh này, Đông y có những phương thuốc hữu hiệu dưới đây. Tùy theo thể lâm sàng, bạn đọc có thể tham khảo và áp dụng.
Nguyên nhân của bệnh là do tinh thần kích động, lo nghĩ khiếp sợ, rối loạn tâm trí, đau ốm kéo dài làm cho thận âm hư tổn không nuôi được tâm tỳ, dẫn đến tình trạng mất ngủ. Để điều trị chứng bệnh này, Đông y có những phương thuốc hữu hiệu dưới đây. Tùy theo thể lâm sàng, bạn đọc có thể tham khảo và áp dụng.
Mất ngủ do tâm hỏa thịnh
Triệu chứng: đau đầu, váng đầu, lưỡi đỏ, lợi sưng đau, đại tiện táo
bón, giấc ngủ chập chờn, hay mơ hay giật mình, trằn trọc không yên.
Phép chữa: Thanh tâm hỏa, dưỡng tâm an thần.
Bài 1: Hoàng liên 10g, hoàng bá 10g, lá vông 20g, xấu hổ 16g, bạch
linh 10g, cỏ mực 20g, tang diệp 20g, đinh lăng 20g, rau má 20g. Ngày 1
thang, sắc 3 lần uống 3 lần.
Bài 2: Chi tử 12g, hoa hòe 12g, hoàng liên 10g, hắc táo nhân 16g, cỏ
mần trầu 16g, trinh nữ 16g, bạch linh 10g, cam thảo 12g, đương quy 12g,
thủ ô chế 10g. Ngày 1 thang, sắc 3 lần uống 3 lần.
Mất ngủ do can khí uất kết
Triệu chứng: Đau tức hạ sườn, da vàng tiểu đỏ, đau đầu, khó ngủ, ăn uống kém, phân thường táo, miệng đắng, rêu lưỡi vàng.
Phép chữa: Giải uất hòa can, thanh tâm dưỡng tỳ.
Bài 1: Đan bì 10g, chi tử 12g, bạch thược 12g, rau má 20g, nam hoàng
bá 16g, cỏ mực 20g, đan sâm 12g, ích mẫu 16g, cam thảo 12g. Ngày 1
thang, sắc 3 lần uống 3 lần.
Bài 2: Hương phụ 12g, chỉ xác 10g, chi tử 12g, tang diệp 20g, hoài
sơn 12g, liên nhục 12g, hắc táo nhân 16g, khởi tử 12g, hạ liên châu 10g.
Sắc uống ngày 1 thang.
Cam thảo
Cam thảo
Mất ngủ ở thời kỳ tiền mãn kinh
Triệu chứng: Khó ngủ kèm theo những cơn bốc hỏa, đau đầu, da khô, bức
bách trong lồng ngực, mồ hôi toát ra bất kì, đau xương, đau ngực…
Phép chữa: Dưỡng tâm hạ khí, bình can, thanh nhiệt.
Bài 1: Hắc táo nhân 16g, đan sâm 12g, đinh lăng 20g, bán hạ 10g, hậu
phác 10g, biển đậu 12g, cỏ mực 16g, bạch thược 12g, đan bì 10g, khởi tử
10g, cam thảo 12g. Ngày 1 thang, sắc 3 lần uống 3 lần.
Bài 2: Đương quy 12g, hà thủ ô 12g, ích mẫu 12g, đan sâm 12g, bạch
linh 10g, bá tử nhân 12g, chi tử 12g, cát căn 16g, hoài sơn 16g, liên
nhục 12g, kim ngân 16g, thục địa 12g, cam thảo 12g. Ngày 1 thang, sắc 3
lần uống 3 lần.
Bài 3: Ngân hoa 10g, liên kiều 10g, cỏ mực 16g, đan bì 10g, chi tử
12g, bạch thược 12g, nam hoàng bá 12g, hắc táo nhân 16g, bán hạ 10g, hậu
phác 10g, đinh lăng 16g. Ngày 1 thang, sắc 3 lần uống 3 lần.
Mất ngủ do tâm tỳ lưỡng hư
Triệu chứng: Tỳ hư không tổng hợp được tinh chất, tâm thiếu nuôi
dưỡng, sinh ra những chứng trạng: ngủ hay mơ, giấc ngủ rất ngắn, nhanh
tỉnh, thường hay hồi hộp, hay quên, sức làm việc rất kém, sắc mặt ủ rũ,
rêu lưỡi nhợt, mạch tế nhược.
Phép chữa: Bổ dưỡng tâm tỳ để sinh khí huyết.
Bài 1: Bạch truật 16g, hoài sơn 16g, liên nhục 16g, đương quy 16g,
ngũ gia bì 16g, cam thảo 12g, thục địa 12g, sinh khương 6g, thủ ô chế
12g, đại táo 12g. Ngày 1 thang, sắc 3 lần uống 3 lần.
Bài 2: Đinh lăng 16g, thủ ô chế 16g, đương quy 16g, ngũ gia bì 16g,
bán hạ 10g, hậu phác 10g, sinh khương 6g, trần bì 10g, cam thảo 12g,
bạch truật 12g, thương truật 10g, đại táo 12g. Ngày 1 thang, sắc 3 lần
uống 3 lần.
Bài 3: Hắc táo nhân 16g, lá vông 20g, biển đậu 12g, đương quy 16g,
trần bì 12g, bạch truật 16g, ngũ gia bì 16g, củ đinh lăng 16g, sinh
khương 6g, cao lương khương 10g, sơn tra 10g, đại táo 12g, cam thảo 12g.
Ngày 1 thang, sắc 3 lần uống 3 lần.
Theo – Sức khỏe & Đời sống
Lưu ý: Những Thông tin trên mang tính chất tham khảo, để
việc điều trị bệnh của bạn có hiệu quả cao nhất bạn nên tham khảo ý
kiến của Bác Sĩ trước khi áp dụng!
http://www.baithuochay.net/?bai-thuoc-dan-gian=bai-thuoc&p=325&bai-thuoc-nam-tri-benh-mat-ngu.htmlChúc mọi gia đình được khoẻ mạnh!
Thursday, January 15, 2015
"CHÀ ĐỒ NHÔM" .........CHÙI ĐỒ NHÀ


Hôm nay mình thử ra tay xem có đúng như lời nói không nha.
Cũng đúng đó - nhưng chờ cho nó ngấm và nhả dơ trong khay nướng ra, mình chờ cũng 5-10 phút ... phải dùng bùi nhùi xanh chà cũng đã tay luôn chớ không phải chơi !!! Nhưng cũng khá sạch so với cái chưa được chà. Nhìn giờ mới thấy là mình bake rất nhiều - và chùi mỗi 3-4 tháng 1 lần không đủ ... phải mỗi lần mới giữ khay sạch được.
1 cup baking soda
1/2 cup hydrogen peroxide (mua ở tiệm bán thuốc)
source:
http://vir93-20.diply.com/viral-vines/things-been-cleaning-wrong/86503
Chúc mọi gia đình được no ấm!
Monday, November 17, 2014
Hành tây phi


bên trên là hành tây bào = cọng hành nhỏ và đều
còn dưới đây là hành tây xắt bằng dao = cọng hành dài hơn

Dùng đồ bào lớn của Hàn Quốc để bào hành ra rất lẹ - hay có thể cắt bằng dao cũng được.
Lưu ý:
--nếu củ hành tây trung bình thì chiên mỗi lần 2 củ thôi - còn củ lớn thì chiên 1/2 củ một - ý nói là chiên ít mỗi lần thì hành sẽ mau vàng hơn và dể canh độ vàng của hành. Sẽ chiên mau hơn đấy.
Hành phi này ăn với bánh cuốn hay bánh ướt thì hết xẩy.
Chúc mọi gia đình được no ấm!
Bagels - Recipe by Peter Reinhart


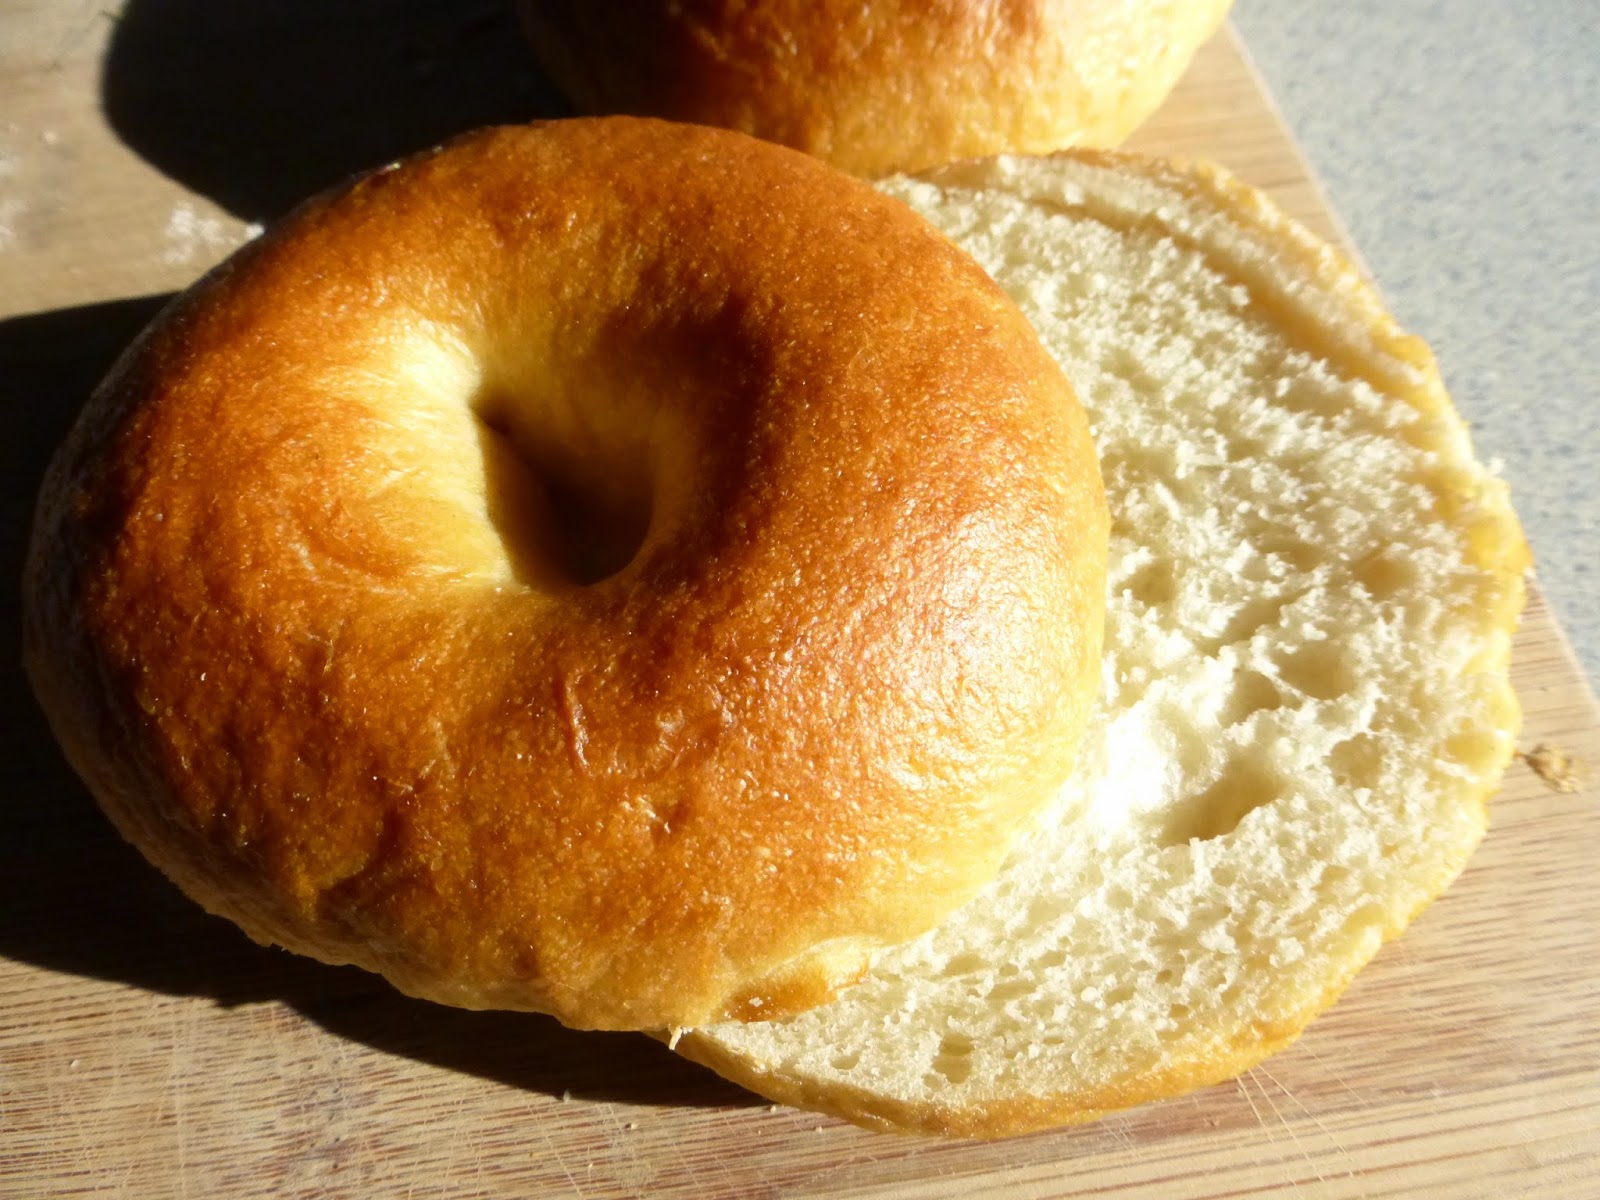

Original recipe by Peter Reinhart - Bagels made by Tracy Tran/ChơnNghiêm
peter reinhart’s bagels
Adpated from The Bread Baker’s ApprenticeHoo boy, there are a lot of notes for this one, so you might want to skim ahead to the end first. Otherwise, these are utterly glorious as-is, chewy with a crispy and tough exterior and a soft, flavorful interior. I have it on good authority that these are as good as, if not better, than the Old School variety.
Yield: 12 extremely large, 16 regularly large or 24 miniature bagels
Sponge
1 teaspoon instant yeast
4 cups unbleached high-gluten or bread flour (see note below)
2 1/2 cups water, room temperature
Dough
1/2 teaspoon instant yeast
3 3/4 cups unbleached high-gluten or bread flour
2 3/4 teaspoons salt
2 teaspoons malt powder or 1 tablespoon dark or light malt syrup, honey, or brown sugar (see note below)
To Finish
1 tablespoon baking soda
Cornmeal or semolina flour for dusting
Sesame seeds, poppy seeds, kosher salt, rehydrated dried minced garlic or onions (Deb note: this was what I chose, and found the taste very authentic), or chopped onions that have been tossed in oil (optional)
1. Day one: To make the sponge, stir the yeast into the flour in a 4-quart mixing bowl. Add the water, whisking or stirring only until it forms a smooth, sticky batter (like pancake batter). Cover the bowl with plastic wrap and leave at room temperature for approximately 2 hours, or until the mixture becomes very foamy and bubbly. It should swell to nearly double in size and collapse when the bowl is tapped on the countertop.
2. To make the dough, in the same mixing bowl (or in the bowl of an electric mixer), add the additional yeast to the sponge and stir. Then add 3 cups of the flour and all of the salt and malt. Stir (or mix on low speed with the dough hook) until the ingredients for a ball, slowly working in the remaining 3/4 cup flour to stiffen the dough.
3. Transfer the dough to the counter and knead for at least 10 minutes (or for 6 minutes by machine). The dough should be firm, stiffer than French bread dough, but still pliable and smooth. There should be no raw flour – all ingredients should be hydrated. The dough should pass the windowpane test and register 77 to 71 degrees F. If the dough seems to dry and rips, add a few drops of water and continue kneading. If the dough seems tacky or sticky, add more flour to achieve the stiffness required. The kneaded dough should feel satiny and pliable but not be tacky.
4. Immediately divide the dough into 4 1/2 ounce pieces for standard bagels, or smaller if desired (Deb note: I used 2.25 ounce pieces, and yes, I weighed them because I wanted them to bake evenly). Form the pieces into rolls.
5. Cover the rolls with a damp towel and allow them to rest for approximately 20 minutes.
6. Line 2 sheet pans with baking parchment and mist lightly with spray oil. Proceed with one of the following shaping methods:
Method 1: Poke a hole in a ball of bagel dough and gently rotate your thumb around the inside of the hole to widen it to approximately 2 1/2 inches in diameter (half of this for a mini-bagel). The dough should be as evenly stretched as possible (try to avoid thick and thin spots.)
Method 2: Roll out the dough into an 8-inch long rope. (This may require rolling part of the way and resting if the pieces are too elastic and snap back, in which case, allow them to rest for 3 minutes and then extend them again to bring to full length. Wrap the dough around the palm and back of your hand, between the thumb and forefinger, overlapping the ends by several inches. Press the overlapping ends on the counter with the palm of your hand, rocking back and forth to seal.
7. Place each of the shaped pieces 2 inches apart on the pans (Deb note: I got away with 1-inch space for the minis). Mist the bagels very lightly with the spray oil and slip each pan into a food-grade plastic bag, or cover loosely with plastic wrap. Let the pans sit at room temperature for about 20 minutes.
8. Check to see if the bagels are ready to be retarded in the refrigerator by using the “float test”. Fill a small bowl with cool or room-temperature water. The bagels are ready to be retarded when they float within 10 seconds of being dropped into the water. Take one bagel and test it. If it floats, immediately return the tester bagel to the pan, pat it dry, cover the pan, and place it in the refrigerator overnight (it can stay in the refrigerator for up to 2 days). If the bagel does not float. Return it to the pan and continue to proof the dough at room temperature, checking back every 10 to 20 minutes or so until a tester floats. The time needed to accomplish the float will vary, depending on the ambient temperature and the stiffness of the dough.
9. The following day (or when you are ready to bake the bagels), preheat the oven to 500 degrees F with the two racks set in the middle of the oven. Bring a large pot of water to a boil (the wider the pot the better), and add the baking soda (and optionally, a few tablespoons of barley syrup, see Note at the end). Have a slotted spoon or skimmer nearby.
10. Remove the bagels from the refrigerator and gently drop them into the water, boiling only as many as comfortably fit (they should float within 10 seconds). After 1 minutes flip them over rand boil for another minute. If you like very chewy bagels, you can extend the boiling to 2 minutes per side (Deb note: I used the 2 minute option). While the bagels are boiling, sprinkle the same parchment-lined sheet pans with cornmeal or semolina flour. (If you decide to replace the paper, be sure to spray the new paper lightly with spray oil to prevent the bagels from sticking to the surface.) If you want to top (see note below) the bagels, do so as soon as they come out of the water. You can use any of the suggestions in the ingredients list or a combination.
11. When all the bagels have been boiled, place the pans on the 2 middle shelves in the oven. Bake for approximately 5 minutes, then rotate the pans, switching shelves and giving the pans a 180-degree rotation. (If you are baking only 1 pan, keep it on the center shelf but still rotate 180 degrees.) After the rotation, lower the oven setting to 450 degrees F and continue baking for about 5 minutes, or until the bagels turn light golden brown. You may bake them darker if you prefer. (Deb note: I actually baked them quite a bit longer, often almost five extra minutes. I judge by color, not internal temperature, in this case. I did not lower the oven temperature because I had multiple batches to bake.)
12. Remove the pans from the oven and let the bagels cool on a rack for 15 minutes or longer before serving.
Cinnamon Raisin Bagels: For cinnamon raisin bagels, increase the yeast in the final dough to 1 teaspoon, and add 1 tablespoon of ground cinnamon and 5 tablespoons of granulated sugar to the final dough. Rinse 2 cups of loosely packed raisins with warm water to wash off surface sugar, acid, and natural wild yeast. Add the raisins during the final 2 minutes of mixing. Proceed as directed, but do not top the bagels with any garnishes. When they come out of the oven and are still hot, you can brush the tops with melted butter and dip them in cinnamon sugar to create a cinnamon-sugar crust, if desired.
Notes:
- In his introduction to bagels, Reinhart mentions two ingredients that are not exactly ordinary, but completely essential to the bagel texture and flavor. The first is barley malt powder or syrup, more for that typical bagel shop flavor than anything else, and something that was readily available at Whole Foods and a bunch of other stores. Sadly, I cannot tell you if this ingredient is as essential as he said because I woke up with a startle at 7 a.m. the next morning, “Oh my god I forgot to add the barley syrup!” Don’t you hate it when that happens? Later, I read a recipe that suggested you add the barley syrup to the boiling water bath, and I did so in my later batches, figuring it wouldn’t hurt to get the flavor in somewhere. I ended up feeling that these bagels had a slightly darker, and more stereotypically-bagel color than the earlier batches, so I am adding this as an optional step.
- The second is high gluten flour, a step above the extra gluten in bread flour. (Though he says regular bread flour will work in a jam, I’m used to getting top-notch bagels, and was convinced I’d be able to tell the difference.) This can be ordered online or available in a specialty store (though I couldn’t come up with one in NYC that had it). Or, you can beg your local bagel shop for some of theirs, and given that the other two options would take time and energy, I turned to our beloved Murray’s on 8th Avenue. They came through, and then some, and I am now the proud own of some ten pounds of super-high gluten flour, and a sinking feeling that I’ll be making bagels again or some very tough cookies (bah!) this winter. The crazy, it keeps coming.
- I had difficulties getting my seeds and onion bits to stick to the top of the bagels. Though the recipe does not call for an egg wash, I would definitely use one next time to get them to stick, after the boiling and before the baking.
- These pictures were taken with a film camera! Our camera had a mishap (we’ll call it) last Friday and was out for repair when I made these bagels. Instead, I used Alex’s old manual Canon Rebel, replete with my macro lens and our Speedlite flash. How cool is it that everything works together? On Saturday, my dad was kind enough to lend us his Rebel XTi until ours came out of the shop, which is supposed to be today. (Pictures taken with his camera can be seen in the previous post.) Hooray for SantaDad, and camera repair shops that work quickly!
- Although Alex may have been the cause of the camera’s injury, he deserves a hearty round of applause for typing this entire recipe for us. 1,999 words!
Chúc mọi gia đình được no ấm!
Classic French Bread Recipe By Peter Reinhart


Original link and recipe:
http://www.npr.org/templates/story/story.php?storyId=120580907
Classic French Bread By Peter Reinhart
Makes 2 large loaves, 4 small loaves, or many rolls.
5-1/3 cups (24 oz / 680 g) unbleached bread flour
2 teaspoons (0.5 oz / 14 g) salt, or 1 tablespoon coarse kosher salt
2-1/4 teaspoons (0.25 oz / 7 g) instant yeast
2 cups (16 oz / 454 g) lukewarm water (about 95°F or 35°C)
Do Ahead
Combine all of the ingredients in a mixing bowl. If using a mixer, use the paddle attachment and mix on the lowest speed for 1 minute. If mixing by hand, use a large spoon and stir for 1 minute, until well blended and smooth. If the spoon gets too doughy, dip it in a bowl of warm water. The dough should form a coarse shaggy ball. Let it rest, uncovered, for 5 minutes.
Switch to the dough hook and mix on medium-low speed for 2 minutes or knead by hand for about 2 minutes, adjusting with flour or water as needed. The dough should be smooth, supple, and tacky but not sticky.
Whichever mixing method you use, knead the dough by hand on a lightly floured work surface for about 1 minute more, then transfer it to a clean, lightly oiled bowl. Cover the bowl with plastic wrap, then immediately refrigerate overnight or for up to 4 days. If the dough feels too wet and sticky, do not add more flour; instead, stretch and fold it one or more times at 10-minute intervals, as shown on page 18, before putting it in the refrigerator. (If you plan to bake the dough in batches over different days, you can portion the dough and place it into two or more oiled bowls at this stage.)
On Baking Day
Remove the dough from the refrigerator about 2 hours before you plan to bake. Gently transfer it to a lightly floured work surface, taking care to degas it as little as possible. For baguettes and batards, divide the cold dough into 10-ounce (283 g) pieces; for 1 pound boules, divide the dough into 19-ounce (53 g) pieces; and for freestanding loaves, use whatever size you prefer.
Form the dough into batards and/or baguettes (see pages 21 and 22) or boules (see page 20). Mist the top of the dough with spray oil, loosely cover with plastic wrap, and proof at room temperature for about 1-1/2 hours, until increased to 1-1/2 times its original size.
About 45 minutes before baking, preheat the oven to 550°F (288°C) or as high as it will go, and prepare the oven for hearth baking (see page 30).
Remove the plastic wrap from the dough 15 minutes prior to baking; if using proofing molds, transfer the dough onto a floured peel.
Just prior to baking, score the dough 1/2 inch deep with a serrated knife or razor. Transfer the dough to the oven, pour 1 cup of hot water into the steam pan, then lower the oven temperature to 450°F (232°C).
Bake for 12 minutes, then rotate the pan and bake for another 15 to 25 minutes, until the crust is a rich golden brown, the loaves sound hollow when thumped, and the internal temperature is about 200°F (93°C) in the center. For a crisper crust, turn off the oven and leave the bread in for another 5 minutes before removing.
Cool the bread on a wire rack for at least 45 minutes before slicing or serving.
Variation
By simply varying the method so that the shaped loaves undergo cold fermentation, rather than the freshly mixed bulk dough, you can create a spectacular loaf with a distinctive blistered crust. After the dough is mixed and placed in a clean, oiled bowl, let it rise at room temperature for about 90 minutes, until doubled in size. Divide and shape as described above, mist with spray oil, then cover the shaped dough loosely with plastic wrap and refrigerate it overnight, away from anything that might fall on it or restrict it from growing.
The next day, remove the dough from the refrigerator 1 hour before baking. It should have grown to at least 1-1/2 times its original size. Prepare the oven for hearth baking, as described on page 30. While the oven is heating, remove the plastic wrap and let the dough sit uncovered for 10 minutes. Score the dough while it's still cold, then bake as described above.
Chúc mọi gia đình được no ấm!
Thursday, November 13, 2014
french baguette recipe - from Weekendbakery.com


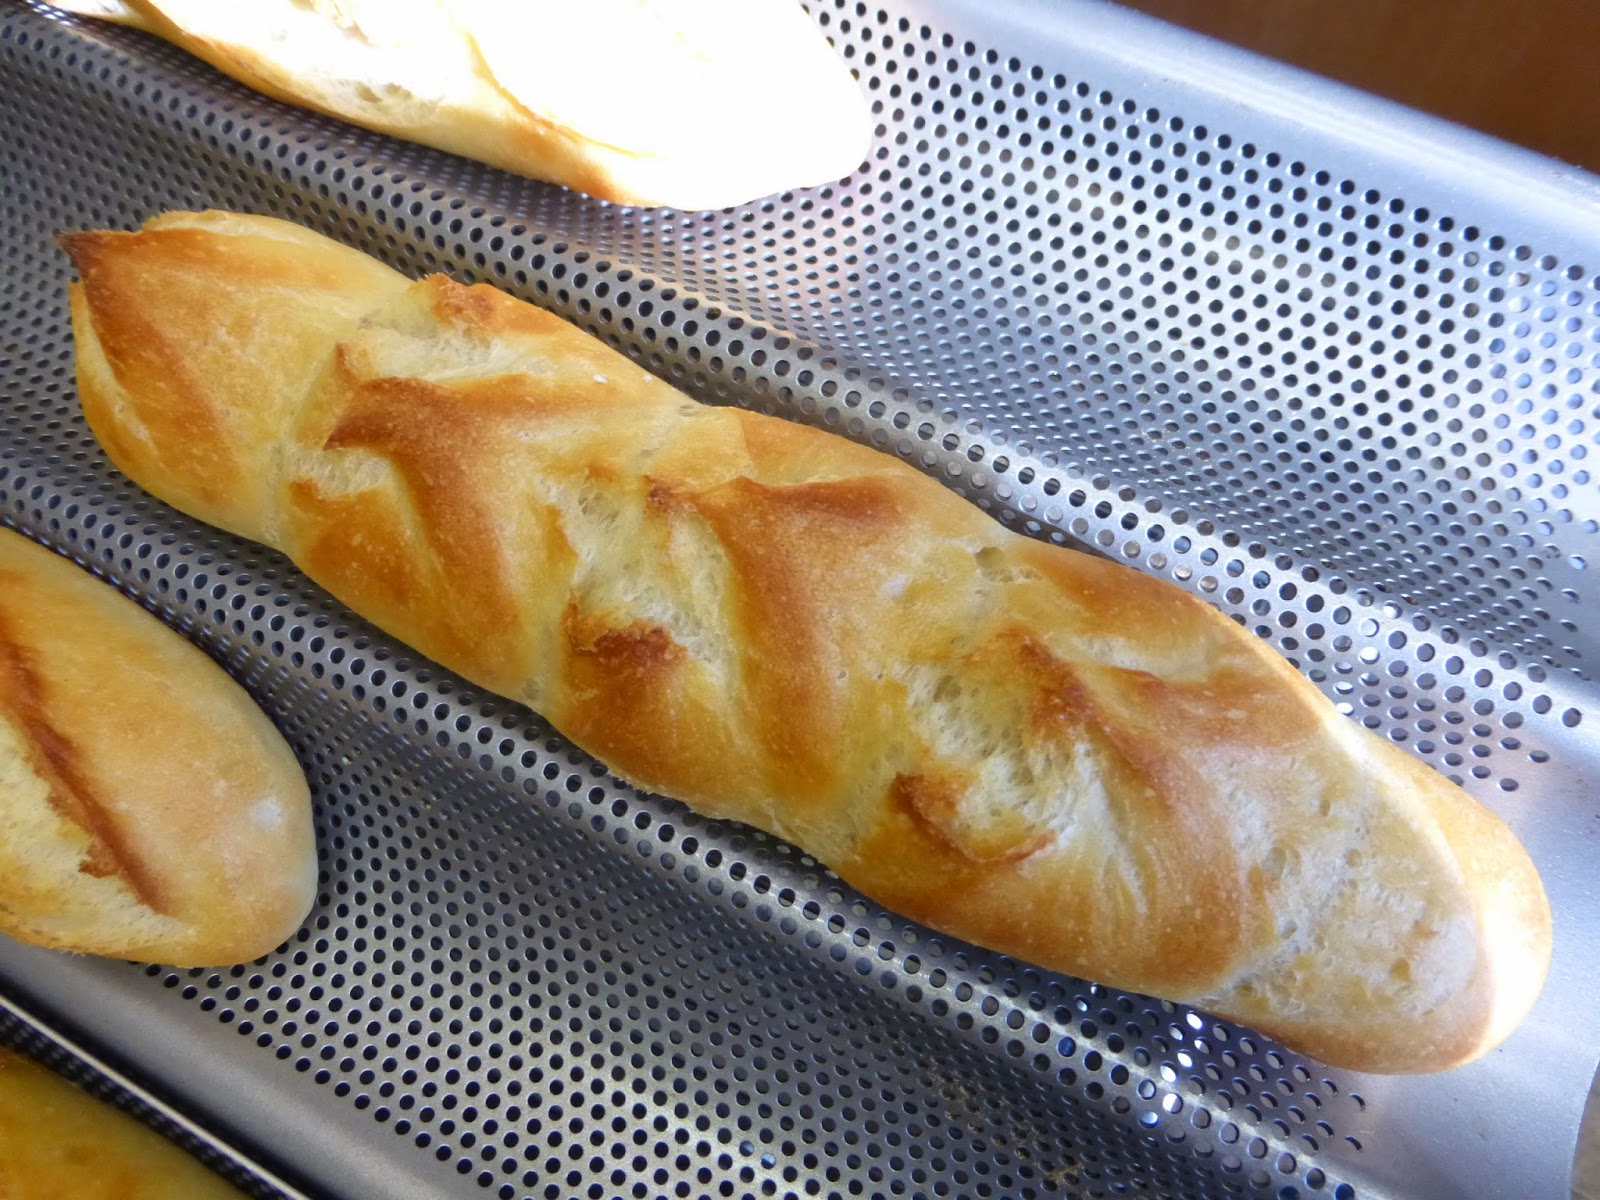


Our other french baguette recipe - from Weekendbakery.com
75% hydration dough
Ingredients for the poolish
380 g wheat (bread) flour
380 g cold water (straight from the tap)
0.7 g instant yeast* (twice the amount in winter!)
Ingredients for the baguettes
1 batch makes 4 baguettes
all the poolish from step 1
380 g wheat (bread) flour
190 g water at room temperature
12 g (sea) salt
2 g instant yeast
* In winter our bakery is between 16ºC / 61ºF and 18ºC / 65ºF, so we use more yeast to get the poolish going. In summer the average temperature is between 21ºC / 70ºF and 25ºC / 77 ºF so we can use less yeast to get the same result. So take the temperature of your surroundings into account to determine your amount of yeast.
Making the poolish
In a bowl stir together 380 grams of bread flour with 380 grams of cold water with the yeast (see above). Mix until you have a consistency that looks like dough-like batter. Cover the bowl and leave for 12 hours at room temperature. So if you want to begin your baguette baking in the morning, you can make your poolish the evening before.
Making the baguettes
In the bowl of your standing mixer, combine the poolish with the other ingredients and knead for 6 minutes. Cover and leave to rest for 40 minutes. Now turn out the mass onto your working surface and stretch and fold, doing two to three sets of letter folds (one set = right over left, left over right, bottom over top, top over bottom) depending on how well your dough cooperates. Stop if the dough is not willing to stretch anymore. Put the dough in a greased bowl, cover and again leave to rest for 40 minutes.
Turn out the dough and stretch and fold a second time, doing one to two sets of letter folds.
Directly after the stretch and fold, divide the dough in 4 equal parts. Now you are going to pre-shape the dough parts one by one by carefully stretching the corners, making a rectangle of each of the 4 pieces, and rolling them up. Try to make your rectangle and roll as even as possible without fussing too much with the dough. Use enough flour to handle the dough, but try to keep it to a minimum. Cover and leave to rest for 10 minutes so the gluten can relax.
Preheat your oven to 240ºC / 465ºF (at what stage you preheat your oven depends on how long it takes for your oven to heat through, some take 30 minutes, some, like ours, with stone floors take a lot longer, up to two hours.)
Take a roll of the pre-shaped dough and sprinkle it with a little flour and softly press it into a rectangle with a short and a long side. The more even the rectangle the nicer the baguette will look in the end. With a dough scraper make sure the dough is not stuck to your work surface with the help of a little bit of flour.
With a dough scraper, flip 1/3 of the long side onto itself and press down the seam, with the heel of your hand, to get some tension on the outside of the dough, now repeat it two more times until you have a roll shape. Make a rolling motion with your hands from the center to the sides with a soft touch to make the baguette longer and to try and make nice pointy ends on both sides of the baguette.
This baguette shaping video on the King Arthur Flour website by Jeffrey Hamelman is really worth a closer look if you are in need of more baguette shaping support.
Practice makes perfect, do not be hard on yourself, it is not an easy job, even with this slightly less sticky dough, compared to the 80% hydration we use for our other baguette recipe.
It would be wise to measure the length of your oven floor, so your baguettes will fit. Normally a baguette is about 60 cm / 23.6 inches long. We have to make ours 45 cm / 17.7 inches maximum so they will fit into our oven.
Place the baguettes in a couche / proofing cloth made of linen or in a baguette pan, or something of your own invention, but make sure the baguettes have enough side support to hold their shape. Cover them and leave to proof for 35 minutes.
Baguettes resting in their couches (beds) made of thick proofing linen
To check if the baguettes are ready, dip your finger in some flour and gently poke your dough.
If the hole disappears completely: under-proofed
If the hole dent pops half way back out: proofing is just right
If the hole stays entirely dented in: over-proofed
Use some semolina or rice flour to prepare your board
Baguettes did final proofing in their couches made from linen cloth
Transferring the baguettes with a flipping board
Scoring baguettes takes a bit of practice
Baguettes into the oven directly on the hot stones
Score the top of the baguettes with a lame/bread scoring tool. Cut as straight along the long axis of the loaf as possible. Mentally divide the baguette into lengthwise thirds, and keep the cuts within the middle third. Overlap the cuts by about one third of their length, while holding the knife at a 30 degree angle. Also check out this very useful video on proper baguette scoring.
Do not use this steam generating method with your normal household oven! Check our oven tips first
You can practice the scoring strokes with a pencil on a piece of paper or a kitchen paper roll first.
Bake in the preheated oven for 27 minutes. Leave to cool on a wire rack.
To get a nice crust, try to create some steam in your oven by putting a small metal baking tray on your oven floor when you preheat the oven and pouring in half a cup of hot water immediately after putting the bread in the oven. Release some steam by setting your oven door ajar 5 minutes before the bread is ready. If you are going to create steam with a baking tray, you maybe also want to turn your oven temperature a bit higher, because you are going to lose some heat in the process.
You can showcase your baguette baking results in the ‘Your Loaves’ section on our website
Baguette time table
Day 1
Make poolish
Day 2
00:00 Mix ingredients 6 minutes
40 minute rest
00:46 – 2-3 letter folds
40 minute rest
01:26 – 1-2 letter fold + divide + pre-shape
10 minute rest
01:41 – shape + proof
35 minutes final proofing
02:20 – into the oven
Baking time 27 minutes
02:47 – take out and leave to cool
The crumb: the holes are slightly less impressive compared to the 80% hydration recipe, but still very nice texture and taste!
Original source:
http://www.weekendbakery.com/posts/o...guette-recipe/
với công thức 75% hydration dough này cũng rất dể làm .... mình tính và đong ra bằng cup và tsp để các chị em dể làm nha
75% hydration dough FRENCH BAGUETTES - over night and cold fermentation for better flavor breads
Polish/Starter/Bột Cái:
3.5 cup (380gr) bread flour (BF) - nếu dùng all purpose flour (APF) + 1/2 tsp gluten bột dai
1.5 cup (380gr) cold water (cho 1-2 cục nước đá vào nước rồi đong ra 1.5 cup)
1.5 tsp (0.7 gr) active dry yeast men nâu
**Trộn đều lên - đậy nắp - để ngoài bàn 1 tiếng - rồi đem để tủ lạnh qua đêm (hay ít nhất hơn 12 tiếng)
Bread Dough/Bột Bánh Mì:
3.5 cup BF (hay APF + 1/2 tsp gluten)
2 tsp muối Kosher
Bột cái thật lạnh trong tủ lấy ra (dùng hết bột cái)
3/4 cup nước lọc (room temperature)
1/2 tsp active dry yeast
**Lấy ra 1/4 cup bột (trong 3.1/2c.) hoà với muối = để ngoài
**Lấy Yeast cho vô nước hoà lên cho tan (với 1/2 tsp đường để giúp men thức giậy mau, nếu là mùa đông trong nhà nhiệt độ dưới 70*F) -- sau 5 phút tan và sùi bọt thì khuấy lên.
**Cho nước Yeast vào bột cái khuấy lên.
**Cho bột còn lại vào bồn + bột cái = để số 2 đánh 5 phút rồi cho số 3 đánh 25 phút = tổng cộng thời gian đánh máy là 30 phút (trong thời gian này ngừng máy 2-3 lần kéo bột xuống khỏi que để bột được đánh và nhồi đều)
**Thoa bột áo lên bột và bàn - trút bột mới đánh mịn ra bàn -- với cái dough scraper và ít bột áo - gấp bột khoãng 25 lần - bột sẽ dai hơn và không còn dính tay nữa.
**Cho bột vào thau ủ - đậy nắp ủ 1 tiếng hay tới 1 tiếng 15 phút cho tới khi bột nỡ gấp đôi (trong thời gian này khi vừa ủ được 15 phút đầu thì mỡ nắp ra gấp bột 8 lần rồi úp lại ủ tiếp - làm 1 lần nữa gấp bột và nghỉ cho tới hết thời gian 1 tiếng.
**Thoa ít bột áo - cho bột ra bàn -- chia bột -- vo tròn -- đậy khăn để nghỉ 10 phút
**Nắn bánh mì - để lên khăn ủ baker couche - đậy lên 1 cái khăn nữa ủ 30-45 phút khi thấy bánh nỡ tròn lại
thử bột xem có thể nướng được chưa =
If the hole disappears completely: under-proofed
If the hole dent pops half way back out: proofing is just right
If the hole stays entirely dented in: over-proofed
**Thấy gần được thì mỡ lò nóng 450*F -- khi nóng thì chuyển bánh mì từ khăn qua khay nướng
**Rạch mặt bánh mì - xịt nước lên bánh mì -- cho vô lò ngay
**Cho nước sôi vào steam bake khay để ngăn dưới == đóng cửa lò lại
**Bake 5 phút ở lửa 450*F -- rồi hạ oven xuống 425*F Bake tiếp 20 phút bánh vàng vừa (vì khi ăn sẽ nướng lại) hoặc 25 phút nếu là ăn ngay sau khi nướng xong.
**Bánh mì đem ra để nguội mới cắt ăn.
chúc chị em làm bánh mì ưng ý và thành công.

Chúc mọi gia đình được no ấm!
Subscribe to:
Posts (Atom)